How to Import WordPress Users from CSV file
ImportWP is a full blown WordPress importer which allows you to import data from many formats into WordPress posts, users, taxonomies and custom post types. This article will start you off and show you how to import users to WordPress from a CSV file.
If you have not downloaded or installed ImportWP for WordPress yet, you can follow this guide here.
Creating a CSV Importer for WordPress Users
Goto the ImportWP section of your WordPress administration area and click on Add New, you should now have infront of you a form where you can set the import type and import template.
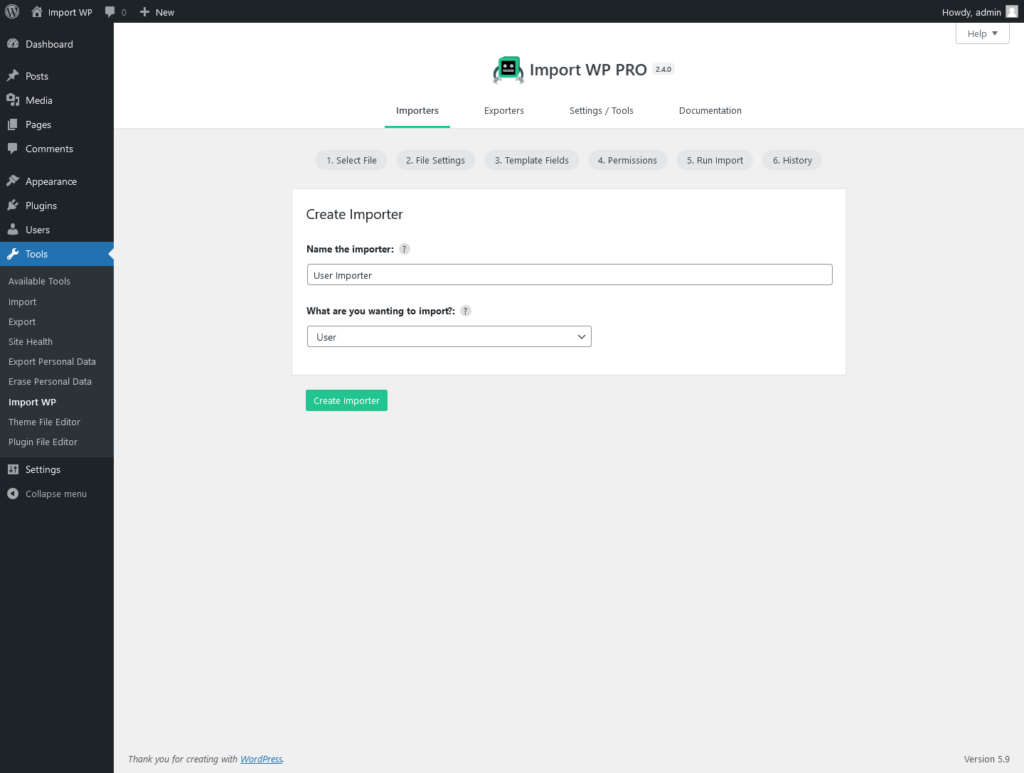
- Set a unique name for your importer for this example we will call it CSV User Import,
- underneath this choose the User template from the list of import templates,
- Keep the datasource as upload, click the file field to upload your csv file,
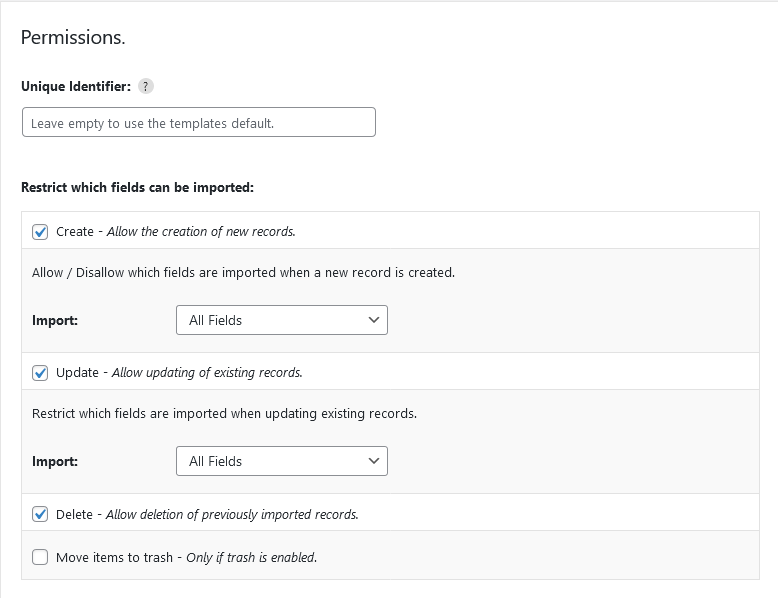
- Choose which permissions you wish to give the importer for this example we just need give it insert.
If you have filled out everything then you should be redirected to your newly create importers settings page.
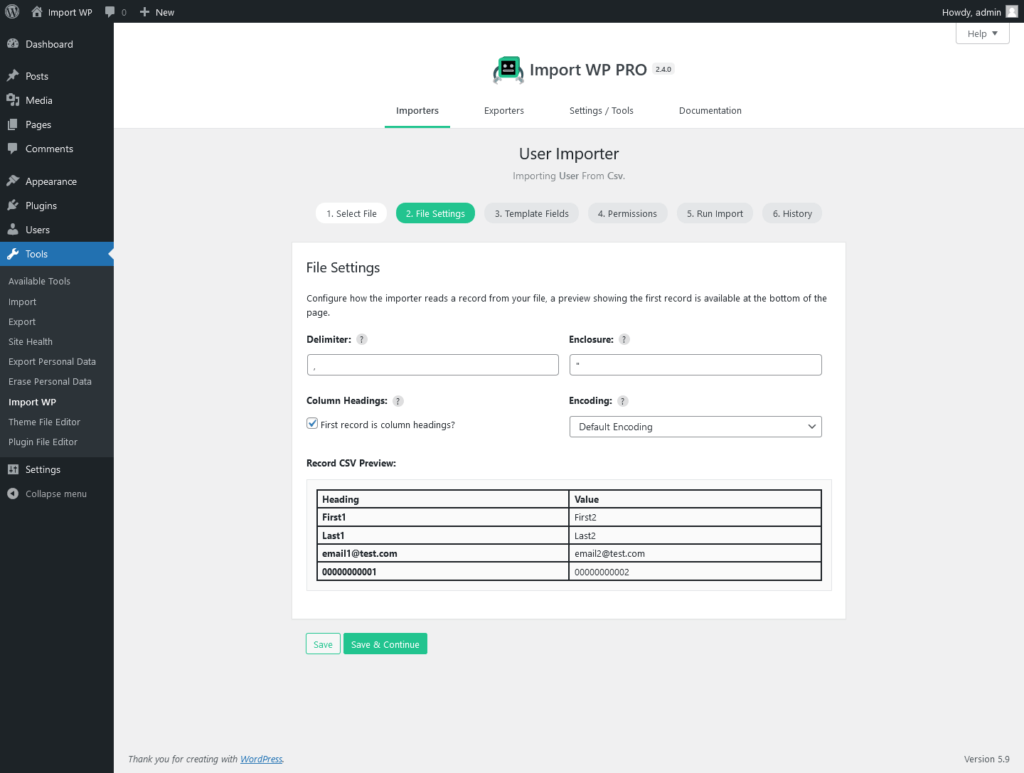
Configuring Importer Options
The general tab of the importer settings section allows you to configure the csv delimiter (delimiter is the seperator which defaults to a comma) and enclosure (enclosure can vary depending on which software you used to export the csv from). In general settings you can set which record you wish to import from (for my user import i had to change this to row number 2 due to avoid the headings), and how many records to import (leave it at 0 to import everything).
Now for the importer permissions, if you filled out the permissions during setup you can skip this section. We will only give insert permission to the csv importer so that if a user already exists on the system with the same details it will not be overwritten, to do this click on the permissions tab and select only the checkbox labelled create.
Mapping CSV columns to user fields
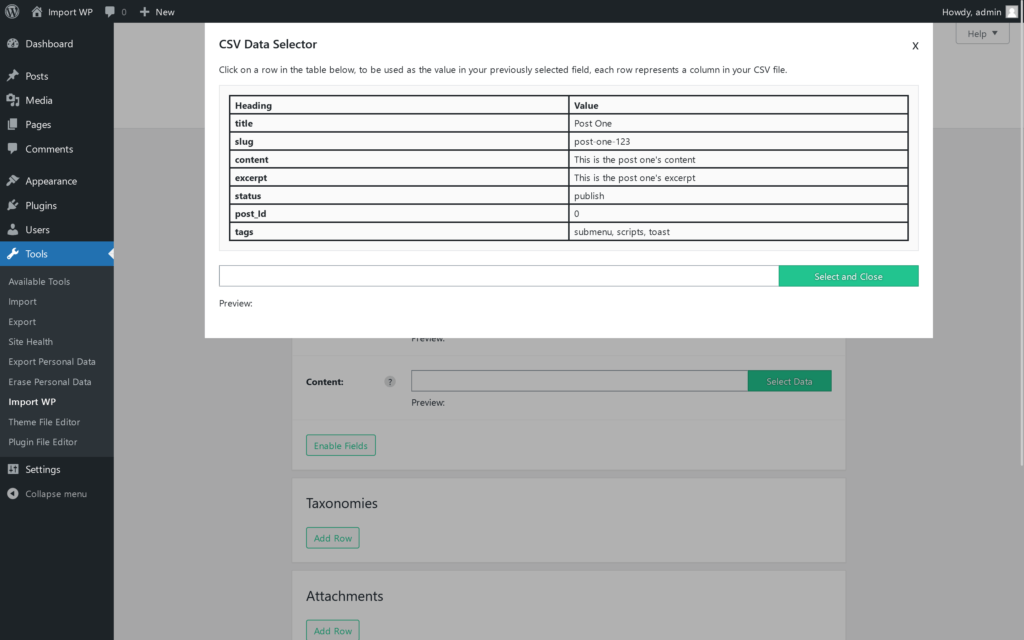
Now we have the importer setup, lets map the csv columns to the user template. To do this click on the button to the right hand side of the template field to start the visual column selector.
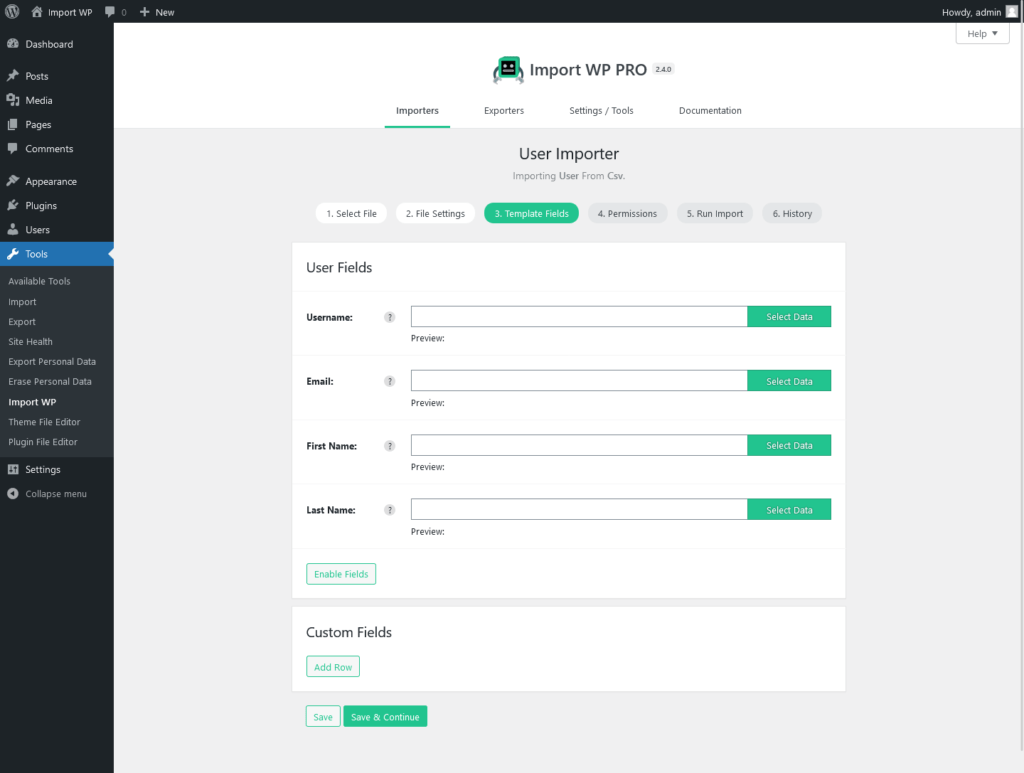
A modal window should appear with a table showing the first 5 rows of the users csv file. Click on the column you wish to use.
Once you have filled in all the field, if you need to enable any other fields or click on the settings tab and check the field you wish to use, once selected the field should appear in the previous fields tab. In this example i have enabled the generate password field, and also the send user registration setting which will email the email address as if they had just registered.
Running the WordPress User import
Once all fields have been setup, you can preview how the data will look by pressing previous/next to loop through the files records under the heading Preview Settings (the preview for each field will be displayed under the field in the template).
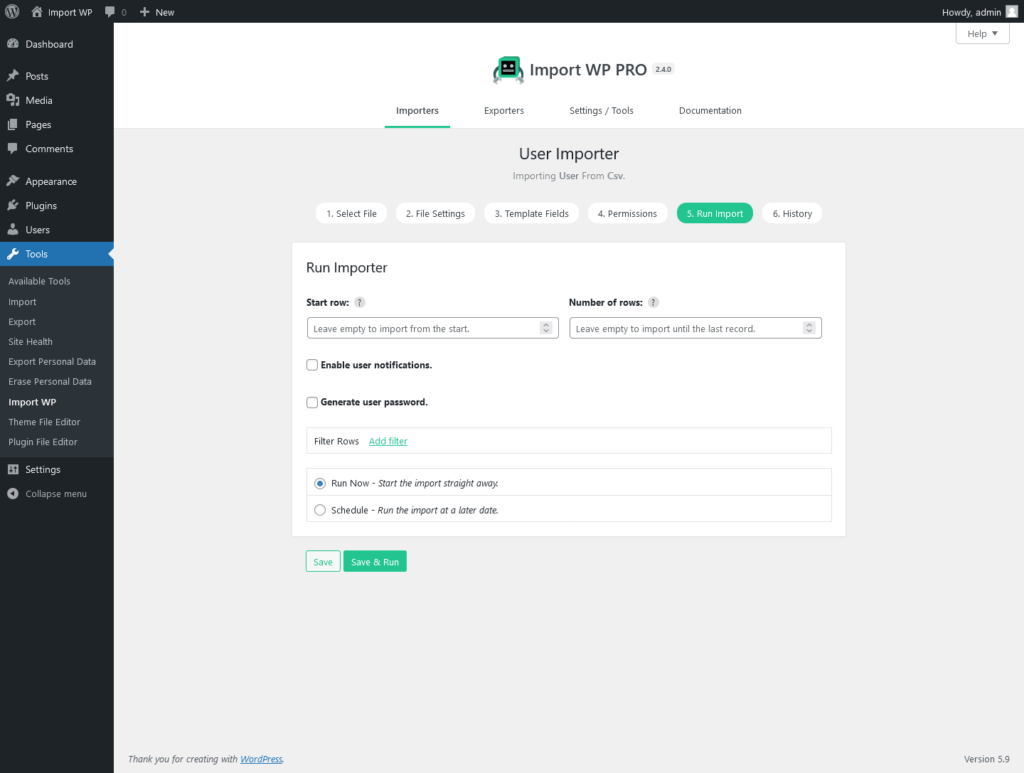
To start the import click on Save & run, this will open up the importer screen. Click on Run Import to start the import process, the table should populate with information about all the users imported, if you accidentally leave the page, you can resume the import by loading up the importer and clicking on the continue import button.
If all has gone well, all the users should have been imported.